Arkwright & Voss
I have made a lot of niche little things at this point, but every so often a print comes along that feels like a little too obscure to have been worth the effort behind it. This one is a scene featuring Elias Arkwright and Celia Voss.
They are characters from the broader Gloom Theory world I have been building with Gloom Darkheart, which, at this stage, has grown from "a weird music project with a spooky book" into a fairly alarming amount of lore, art, characters, rituals and objects that I keep getting urges to recreate in physical form.
Some projects begin with a concept sketch. Some begin with a character sheet. This one began with a grainy sepia photograph from the pages of Mysterious Theories, a paranormal investigation magazine from the 1970s that exists within the Gloom Theory universe.
The image appears as part of an article titled The Strange Obsessions of Dr. Celia Voss, which pieces together the story of Dr. Elias Arkwright, his mysterious death, and the increasingly troubling behaviour of his associate, Celia Voss. It is the sort of article that sits somewhere between investigative journalism, conspiracy theory and historical salvage work. Half document, half speculation.
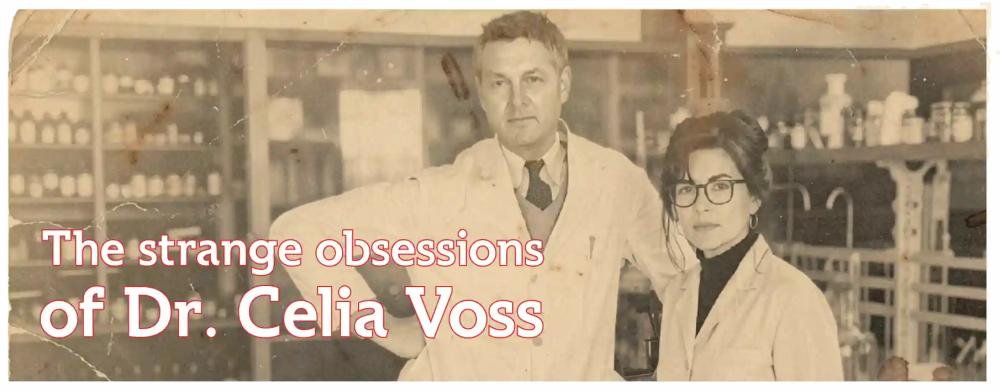
What appealed to me most was that this was not just "make two characters". It was really about translating a fragment of fictional history into an object. The print is based specifically on that photograph, not just on the characters in a general sense. I wanted it to feel like a preserved moment taken from the article itself, as though someone had lifted the image from the page and given it weight.
That gave the piece a very particular direction. It did not need exaggerated action poses or a big action-scene base. It needed restraint. The awkward stillness of an archival photograph. Two figures standing together in a way that looks ordinary at first, but asks more questions when you think about the story and events behind it.
Arkwright needed to feel composed and unreadable. There is something about his role in the article that suggests authority, but also distance. He is presented as brilliant, difficult to pin down and surrounded by incomplete records. Voss, by contrast, carries much more tension. The article frames her as obsessive, brilliant in her own right and increasingly impossible to separate from the work she inherited or continued. So even though the pose is rooted in an old still image, I wanted those personalities to come through in the sculpt.
The 3D Model
Usually I would start in 3ds max, but realistic people are something that I still find quite difficult to build from scratch, especially with two characters involved. Rather than sculpting both figures from a blank sphere and reinventing the wheel, I started in Reallusion's Character Creator. That gave me a useful base for the faces and bodies, and let me rough out the general look of Arkwright and Voss without spending ages just getting to square one.
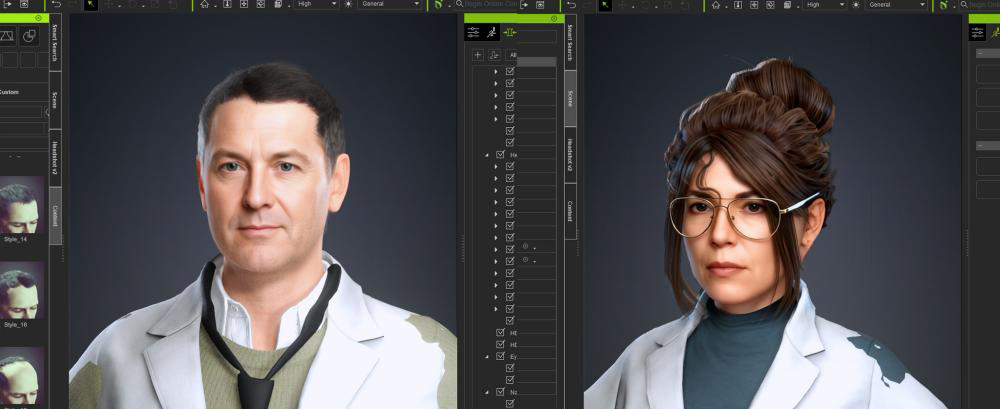
I had to take liberties with the hair and clothes as I don't have a lot of purchases in Character Creator. The aim wasn't to get 100% accurate at this point, just close enough. I used the "Headshot" magics, and then some morphing and shaping tools to get a good base mesh to start with that I could take further in a better app. The main idea was to get the facial structures there.
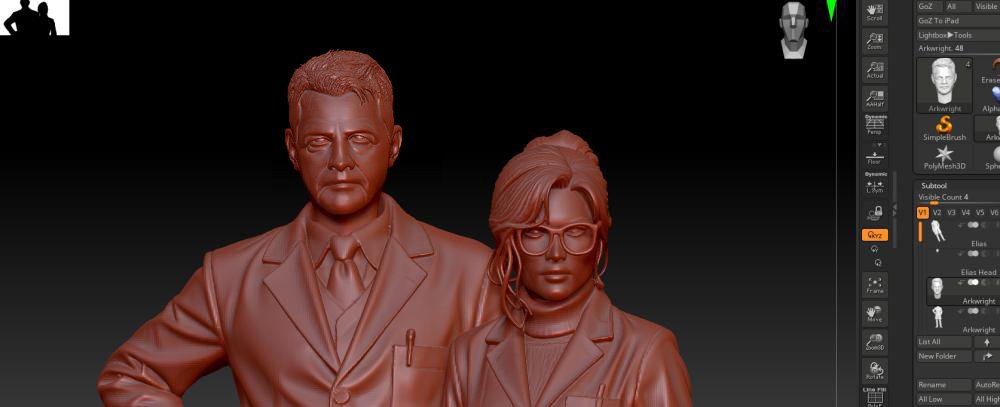
And then it was into ZBrush for a few hours of sculpting and ruining all the hard work Character Creator had done.
To be fair, the meshes that Character Creator spits out are not particularly useful for high-poly printing, I was always going to have to reshape them, subdivide and smooth quite a bit. To be less fair, I am also still pretty terrible at sculpting humans, so there was a definite point where "refining the sculpt" became "slowly sanding off anything that made this person look like themselves."
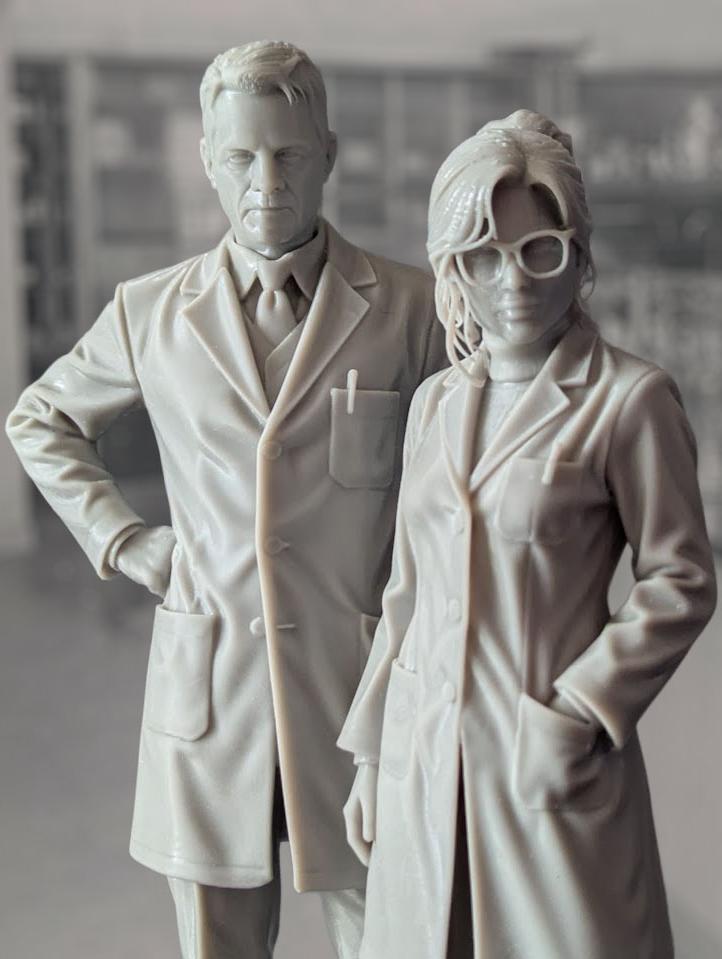
I think I did okay keeping Voss's features. The general face shape survived the process well enough that she still felt like the woman from the photograph. Arkwright was less lucky. After several rounds of pushing, smoothing, fixing and accidentally making things worse, he lost a bit of his look and became more of a "man broadly adjacent to Elias Arkwright" than a great likeness.
It's always a little bit hard to tell, because one aspect of 3D printing models is that you have to overly exaggerate the features. Take the brow crease, or crows feet or dimples and multiply by 10, because when it comes to the print stage, they will always come out less detailed than they look in a 3D model.
The hair at least gave me a bit of a shortcut. I brought in hair from a brush pack, then modified it to get something closer to the shapes in the original image. That saved me from having to build it all from scratch, while still letting me bash it into something that fit the characters properly. It might also actually be responsible for Arkwright's forehead being a little bit too big as I was rushing Zbrush at this stage.
The bodies and clothes were another issue. Character Creator gave me a decent base to start from, but they turned out to just not sit right and were too low poly and 'game'y. In the end I bought some 3D scans of doctors from Epic's FAB, which turned out to be far more useful. I dragged those into ZBrush, painfully bent them into roughly the right poses from the photo and then set about adding details (3D scans tend to be more texture than mesh). It was a slightly cursed process but it gave me much more convincing lab coats and body forms than I would have managed from scratch or from CC. It was particularly helpful that the scans had done more of the cloth-folds for me.
With that complete, the base meshes were done. No need for textures on these ones as these models are being purely 3D printed.
Preparing it to print
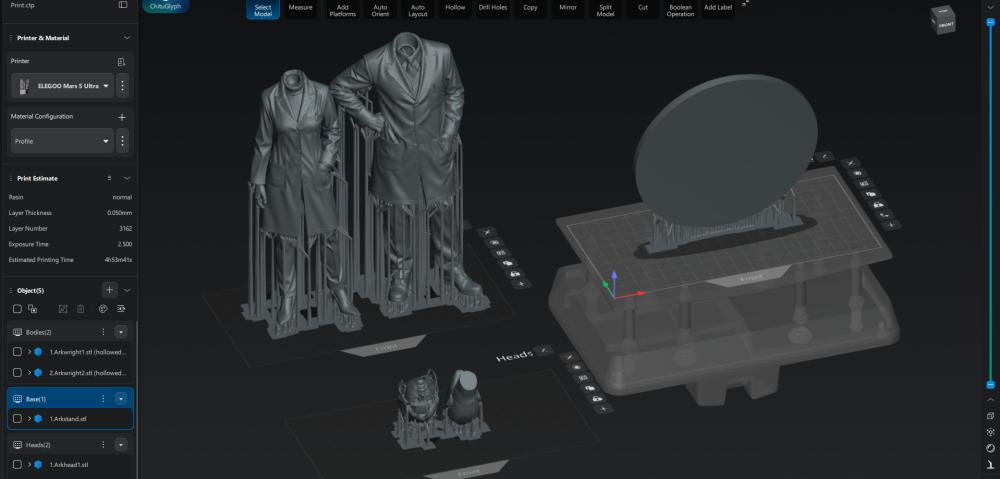
Once everything had been bullied into shape, iI brought them back into 3ds Max to be prepared for printing. That is always the less glamorous part of the process, but it is the stage where the model stops being a digital mess I can keep fiddling with forever and starts becoming something that might actually survive being turned into resin.
We're basically making everything more 'solid'. You can't print wafer-thin labcoats or small mm long pocket-pens. You also can't have gaps within the model (for example, between the shirt and the lab coat). All of these have to be filled in, 'boolean'ed (the act of merging two shapes together) or brough back into Zbrush and sculpt-fixed.
Voss's hair suffered a little bit as it needed some extra mesh spaghetti so that it wouldn't just melt into a pool at the bottom of the vat. I had to dumb down and simplify Arkwright's hair a little too as it was too small and detailed.
I decided to go for my Mars 5 to print these ones - it's a little bit quicker and the detail is finer than my Saturn 4. Annoyingly, I had to shrink them a little to get them to fit the print area, but I feel they still came out large enough. I organised them into three parts - the bodies, the heads and the stand.
And then it was time for their fourteen hour journey out of the goop. Here it is squashed into seconds:
The supports were all good on this print, and nothing really failed spectacularly. Voss's hair suffered a little melting from lack of supports (and getting the over-supported parts off) but nothing particularly disasterous! Here's a look at getting them from freshly printed, to assembled:
-
Fresh out of the printer, washed off with Iso.
-
UV lamp curing them to solidify them fully.
-
The two heads before cleanup. Little bits and bobs need to be sanded off, filled in and smoothed.
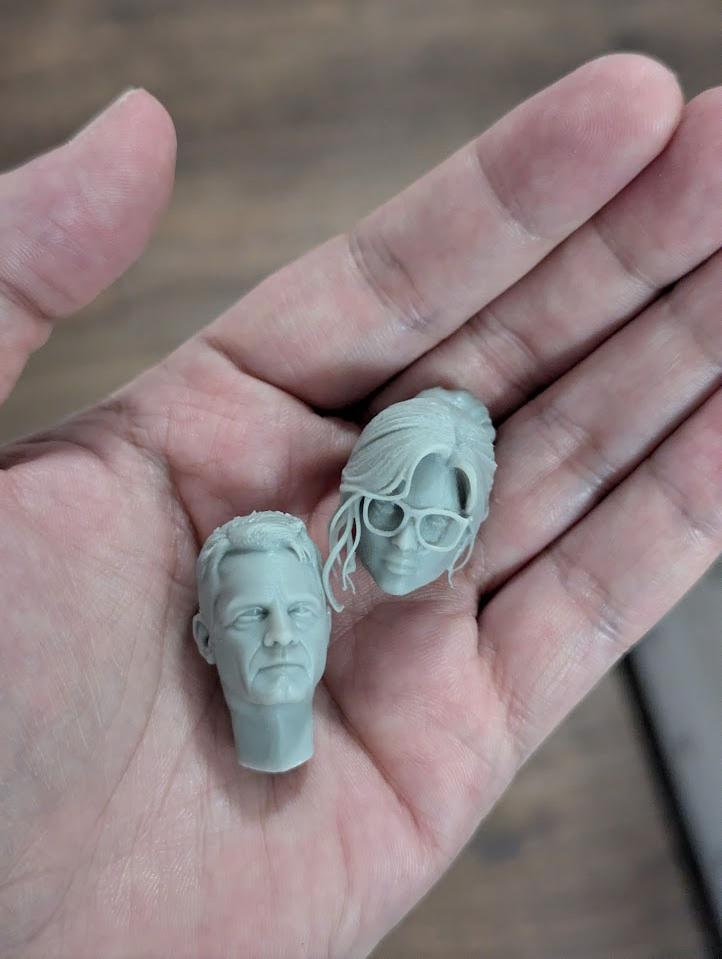
-
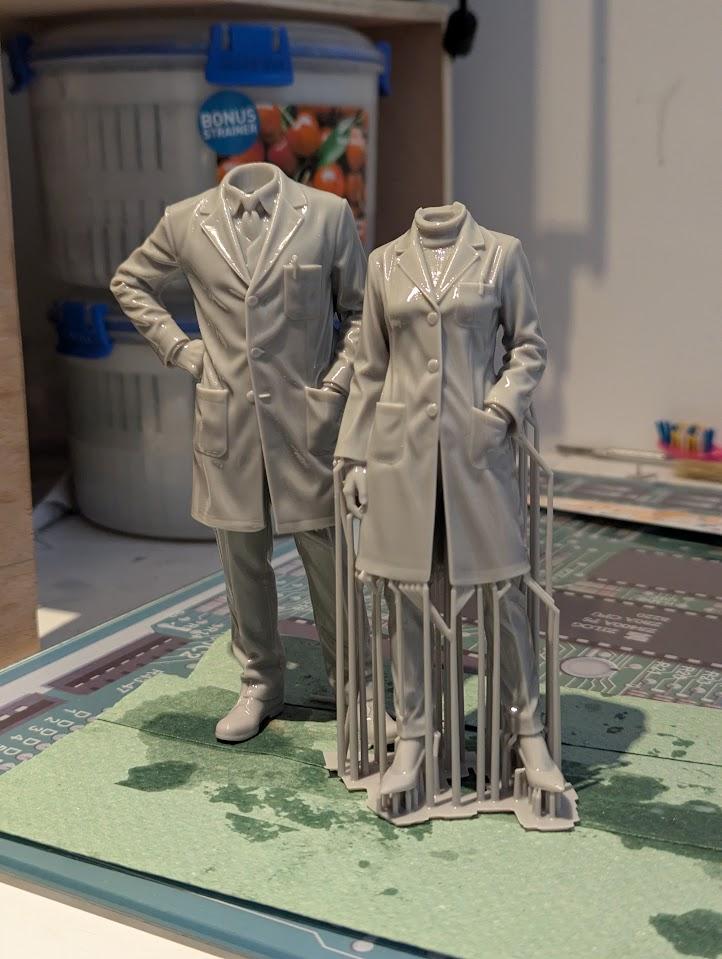
Assembled and ready for preparing to give a coat of primer.
-
Primed and ready to paint. Or are they...
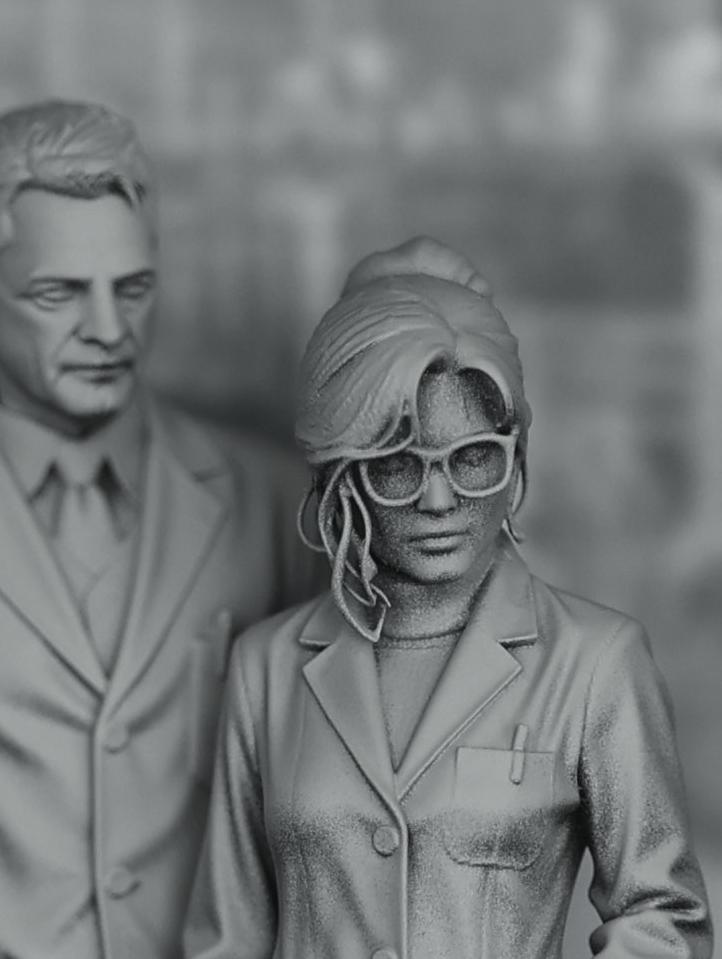
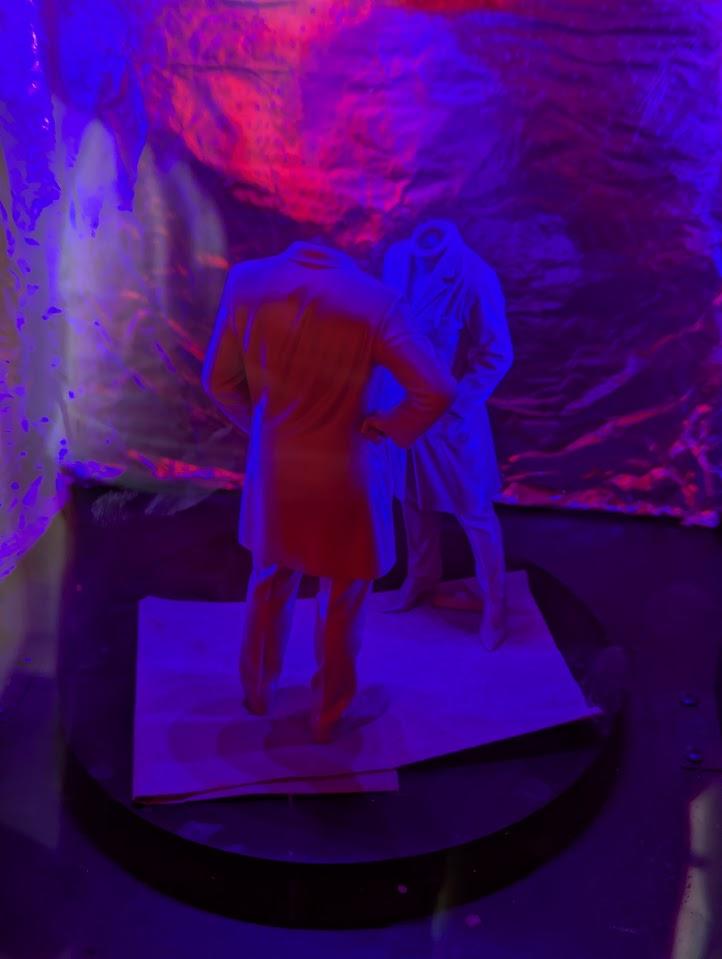
I fully intended to paint them. I set out priming them (chaos) black first, then gave them a grey zenithal spray from above so I could see all the forms properly before starting on the actual colours. Then I looked at them and realised the primer had done something much more interesting than I had planned.
With my distance from the models, the grey spray had gone on with this slightly speckled, uneven rattle-can texture, and against the black it suddenly made the whole thing feel like the original source image. It had that grainy old-photograph look, almost like the figures had been pulled straight out of the Mysterious Theories article rather than turned into a normal painted model... and so I left it alone.
I could have gone in and painted the faces, coats, hair and all the little details, but I think that might have made them feel too literal. The whole point of the print was that it came from this degraded sepia magazine image, and the accidental monochrome finish seemed to keep more of that atmosphere than a full colour paint job would have.
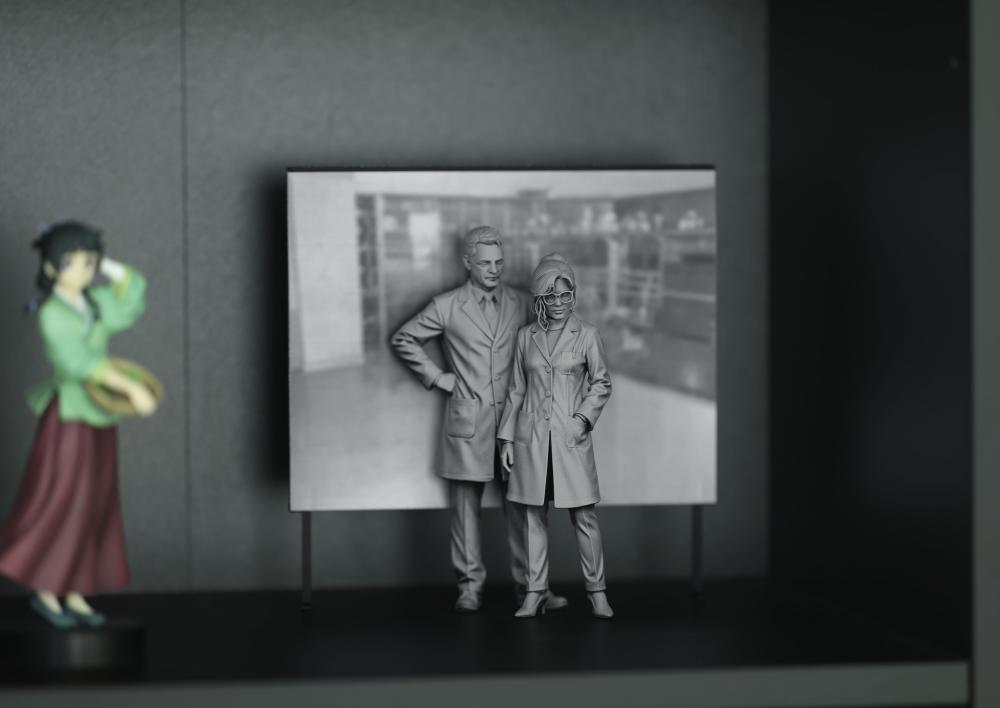
I might print them again at some point and do a proper painted version, because I do still like the idea of giving Voss and Arkwright the full treatment. But for this version, the primer finish works. They are now sitting on my shelf as a bit of fancy, weirdly exclusive Gloom Theory lore merch, which is probably exactly where they belong.
Overall, I’m really happy with them. Voss definitely came out closer to what I had in my head, and I think her likeness survived the whole messy process better than Arkwright’s did. He drifted a bit further away from the source image, mostly because I’m still clumsy enough in ZBrush that every "small fix" has a decent chance of becoming facial vandalism.
That said, they both feel cool as figures and I really like having them on the shelf. The accidental black-and-white effect captures just the right mood, I feel, which is probably more important for this one than perfect likenesses. They feel like something pulled from the pages of Mysterious Theories magazine rather than two random scientists.
I’ll probably keep tweaking Arkwright’s ZBrush model in the background, just in case I ever print them again. There’s definitely a better version of his face in there somewhere, assuming I don’t smooth it into a completely different guy first.
Anyway - as usual, I hope you enjoyed a look behind the scenes making this print!
Related by tags
3dmodellingThe Gloomnomicon
Perilous Prospector
Reprinted Slipgate from Quake
"Gamepig" from System Shock Remake
March 7th Camera from Honkai Star Rail
"Gamepig" from System Shock 2
Astral Express from Honkai Star Rail
Icarus from Quake 2
Silent Hill 2 - Pyramid Head Minifig
Technician from Quake 2
3dprintingRealsteone's "Crowmoder" bust
US APC from Battlezone
US Thunderbolt from Battlezone
Parasite Collectibles 'Emberfinch'
New toys arrived this month.
Nerikson's 'Alyara' sculpt
"Earthworm Jim" from the game
Elegoo Mars 4 Ultra
US 'Truman Bobcat' from Battlezone
US Tug from Battlezone
3dsmaxSystem Shock 2 - Duct
System Shock 2 - Button
System Shock 2 - Terminal Box
System Shock 2 - Door Med 1
System Shock 2 - Cryo Pod
Anya Forger from Spy x Family heh
paintingCCA Gun Tower from Battlezone
US Gun Tower from Battlezone
CCA Scavenger from Battlezone
CCA Czar from Battlezone
CCA Pak from Battlezone
Lunaris' 'Talon' bust
Bestiarum's 'Undead Knight' bust
Bestiarum's 'The Judge'
Bestiarum's Dread Necromancer
US Razor from Battlezone
Who I am
I'm Blake and I like to tinker with things and make stuff. When I'm not programming or developing random systems, I'm playing with electronics, doodling bits of art, 3D modelling or sculpting and painting things or nerding out watching sci-fi or horror TV.
From 2001 I worked in the games industry, eventually specialising in tools to aid in the development of video games and their engines. In 2011 I left the industry and teamed up with a few other talented composers to utilise my knowledge to help build the company 'Spitfire Audio'.
I also periodically compose soundtracks for video-games and have worked on titles such as The Stanley Parable, Portal Knights, Lost in Random as well as a few random projects such as trailer for Terraria and Minecraft and the like. You've probably also heard my music in random TV commercials at some point.
What I'm using to create

I use various bits and bobs to craft my shiz.
- Elegoo Saturn 4 Ultra, Mars 5 Ultra, Mars 4 Ultra,
- 3x Mars 3 Pro backup printers for speed,
- Elegoo ABS-like Resin 3.0,
- Sunla Water-washable grey,
- Elegoo Resin Space Grey 8k,
- Phrozen Luna curing station,
- Vallejo Model Color, Game Air, various sets,
- Iwata Eclipse HP-CS & Studio Smart Jet Pro Compressor,
- Random cheapo airbrushes for base coats,
- 3D Studio Max, ZBrush and Chitubox Pro.