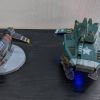
US Grizzly from Battlezone
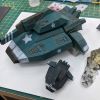
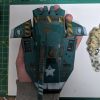
Here's a larger print and paint of the M60A7 Tank (Grizzly) from Activision's rebooted Battlezone game. This was printed at a much larger size than my existing Grizzly and matches the scale of my larger Black Dog Razor. The larger size meant that I could get much more detail on the model than the tiny tabletop-sized one:
About this project
Overall, I'm really happy with how the paint came out. To my memory, it was almost all airbrushed with the exception of some dry brushing and splodging on weather effects. I used enamel paints for the first time and while it was fun, it was much, much messier than acrylics - if anyone has suggestions for keeping clean, feel free to comment in the new comment section below.
The weather effects are a mix of oil, grease and rust from the Tamaya range. I undercoated the model in brown and sealed it in, then airbrushed the green on top and used sandpaper to wear the edges. down and have the brown show through in places. I also added dabs of silver to simulate rusted metal through the paint. The decals are all stencils using my new Cricut (so handy for airbrush stencils).
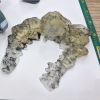
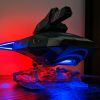
The base was also an experiment. I wanted to try to recreate those cool semi-transparent effects that lots of nice Anime figures have. I printed a dust cloud in transparent resin and then used oil and dirt effects to make it look grimey and sludgey. This sits under the ship holding it up, and looks like the moon dust being kicked up from underneath.
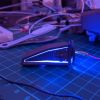
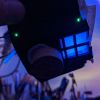
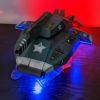
However, the thing that makes this print really unique is that I wanted to take a project a bit further and decided to have the engines and hull light up. It's not completely finished yet, but here's how it looks when turned on with the lights dim:
It's using a mixture of LEDs behind clouded plastic, and fibre-optic cabling to provide engine lights, and pin-lights for the main ship (ala the green light on the hull, and yellow ones underneath). I'll be taking some better pictures once I've finished off the model (it's held together with pins right now while I finalise the insides and see if I want to add more lights to the wings and base).
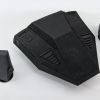
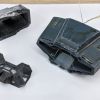
The lighting setup also meant that I modified and re-printed parts to see if they'd integrate lighting better. An example is the wing, which originally has a solid trim around the grated panel. I removed this so that the lights could come through from behind and simulate the glowing effect from the game.
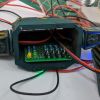
Originally I was going to put an arduino inside it and have the lights glow in and out, or flash, but I thought this might be annoying in the corner of the room, and also felt like overkill for the project. In the end I custom-made a PCB with some LEDs, resisters and plugs on it.
Work in progress shots
Here are some shows from the process of making this thing:
Post-mortem
I figured it might be interesting on these bigger projects to go through what I learn as I work on them. If you're facepalming at some noob mistake I've made, or know tricks to do it better, definitely let me know in the comments at the bottom!
Paint
I was going to put all the detail in from the game, but I stopped short as it felt like it was getting 'busy' enough. I think this was a good decision. The Cricut feels like it really adds ot the paintjob with the ability to design and cut custom stencils. I would have struggled to do the perfect stars, or those skulls or eyes and shark mouth and I'd hate to be without it now. I still had the usual problem of dust particles and fine hairs getting stuck on the paint, though it was much improved with an old bristly paintbrush to dust it off between coats. I mixed up my recipe for 'Battlezone US tank colour' this time and got much closer to the original game, I think. My latest paint was a little too dark and not teal-enough.
 Enamel paints were fun, but holy crap - they can be messy and hard to clean. I'm so used to how easy acrylics are to wipe up and wash and I was a bit unprepared (I don't have any mineral spirits or anything and was having to use my print IPA to clean things). I think I want to investigate their use more as they were much better at weathering and grime-ing up the ship than acrylics.
Print and build
I'm not 100% happy with the dust cloud base. I wish that transparent resin didn't yellow so quickly. I coated this in some Mr Hobby UV clear coat, but it still yellowed over the course of the first day after the print. I think it still looks okay though, and adds to the grimey cloud effect. I may experiment with some other resins to see if there's anything better. The model itself was a test of some new Elegoo resin. I usually swear by AmeraLabs AMD-3 LED, but I'm wanting to find a more local supply as it's getting expensive to import AMD-3. I did have to adjust my exposure times with Elegoo (12 secons, rather than 8) but it's not so bad.
The model was based on the Redux game as a base, but heavily modified to hollow it out (both to save on resin, to fit the elecronics inside and to add panels for the lighting.
I made a few mistakes on the print that set me back days. I ran out of resin twice mid-print which killed those, and I also printed the back of the hull, and the engines at 120% scale by accident, so they were too large. I also modified the print as mentioned above for the lighting aspect. If I was starting again, I think I would 3D model in channels and guides for the cabling inside, as it got a bit hectic with the wires just poking around everywhere. I also want to experiment in future with 3D modelling an area that fits a USB-2 port into it. I bought a pack but could not retroactively work it into this build.
I used my new bench drill for a lot of the drilling on this project. I've started drilling holes and gluing in steel wires to make pins. Resin is still an absolute pain to build together (no superglue or glue I try seems to stick it, and it's too fiddly and ruins the finish to use resin to stick it). With metal pins, it seems to hold better and it also means I can built it up before gluing to see how it looks. White tack is also still working great for holding it together. I need to find a perfect width steel wire - I want something that is quite snug in the 0.75mm holes I'm drilling.
I still need to find more patience for the cleanup-part of the model. I spent more time than usual on this one as there were some serious print defects that needed to be cleaned up (mostly z-wobble making layers visible) but I realised that the parts I cleaned up looked much better than usual. I should spent more time making surfaces smooth and clean. In the paint job, you can still see the layers of the print. A little bit of putty and sanding would go a long way to fixing this, if I had more time.
Electronics
This was the first serious electronic project (I know it's very simple, but my usual limit is solding wires back together). I'd prototyped it with a breadboard but ended up using a small grid-PCB with a custom layout as the breadboard was a bit cramped and wobbly inside the model. The main parts are pretty basic - just parallel circuits of LEDs and some resistors. I still suck as bad as I did in school with a soldering iron, but I got the job done and tried to keep it as neat and tidy as possible.
 The pin-lights for the small buttons and dials on the ships just didn't look great with small LEDs, and I wanted to experiment with lots of lights. I bought some fibre-optic cable and wired them up, and it worked great. I used some heat-shrink insulation tube to make small 'ports' for the fibreoptic cable ends to sit in. The two LEDS on the board to light up the fibre-optic cable (they sit in a sleeve looking down at them). The four sockets are for external LEDs placed around the model.
Related to the cables, a main issue I ran into was that, as you can see in the 3D model above, the ship breaks away into two main hollow pieces - the forward and the aft. The Electronics sit in the aft but there are fibre-optic cables and LEDs running into the front. The LEDs can be unplugged to take the model apart again, and the fibre-optic cable pops out of the sleeves it sits in, but I hadn't considered how brittle the fibre-optic cable would be. It's very hard to get it back into the sleeves to put it back together. I think if I were to start over, I would split the electronics into two and have the fibre cables lit from the front part, so that they don't have to be disconnected/connected when putting the model together.
I'd also create channels and guides in the print. It is such a tiny space that cables going everywhere is a bit of a nightmare. Having some clips or grooves in the print would make this much tidier and easier to manage. Finally, I want to work out a better way to do the power-in. Right now it's a 5v adapter (I used one I had spare laying around) that has permenent cables to the figurine. I bought some USB 2 and USB C ports to try for future projects - I think I would integrate the port into the print and have it so that there are no cables unless you want it plugged in. It might also be interesting to experiment with some kind of lithium battery/charger inside in future. I'm also quite interested in actual custom PCBs (wiring up the tracks on the grid one was super painful to do). Something to investigate in the future!
That's about it really. This was probably a 4-5 hour project if you were to ignore the print time, combine the sessions and undo the mistakes made. Overall I'm happy with how it came out and while I messed up a lot of things, I also learnt just as much. I think it's time for something Soviet for the next big Battlezone Project. Let me know what you think.
Ingredients
For my future reference, and in case you're interested, here's the Ingredients used for the parts and paints of this build:
- Resin: ELEGOO LCD UV 405nm Rapid 3D Resin,
- 3D model: Modified in-game model from Battlezone Redux,
- US tank green: Vallejo Air - 6 part 'Dark Green', 4 part 'Magic Blue' 4 part 'Sombre Grey',
- Orange/yellow: Citadel Averland Sunset,
- Black & white: Vallejo Air 'Dead White' & 'Black',
- Metal: Vallejo Air 'Gunmetal',
- Black wash: Vallejo 'Black wash',
- Weathering: Tamaya 'Rust wash', 'Black wash', 'Gloss Oil Stain'
-
Decal stencils for airbrushing:


- 3D models for printing: You can find the STLs over on this Thingiverse page if you want to try printing this yourself.
Updates to this entry
Early May '23
An STL of the larger 'Grizzly' has been added to my MyMiniFactory page. You can grab the STL from here.
The Battlezone Project
Part of the 'The Battlezone Project' series.
A project to create action figures of each ship from Activision's 1998 Battlezone reboot.
Related by tags
3dprintingRealsteone's "Crowmoder" bust
US APC from Battlezone
US Thunderbolt from Battlezone
Reprinted Slipgate from Quake
Parasite Collectibles 'Emberfinch'
New toys arrived this month.
Nerikson's 'Alyara' sculpt
"Earthworm Jim" from the game
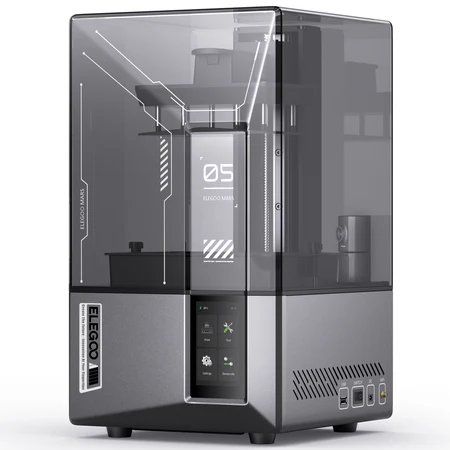
Elegoo Mars 4 Ultra
"Gamepig" from System Shock Remake
videogamesPerilous Prospector
US 'Truman Bobcat' from Battlezone
Silent Hill 2 - Pyramid Head Minifig
US Tug from Battlezone
CCA Gun Tower from Battlezone
US Gun Tower from Battlezone
CCA Scavenger from Battlezone
CCA Czar from Battlezone
CCA Pak from Battlezone
Multivaders - The Sagan Research Outpost
airbrushingLunaris' 'Talon' bust
Bestiarum's 'Undead Knight' bust
Bestiarum's 'The Judge'
Bestiarum's Dread Necromancer
US Razor from Battlezone
Anya Forger from Spy x Family heh
US Badger Turret from Battlezone
US Scavenger from Battlezone
US Wolverine from Battlezone
US Grizzly from Battlezone
paintingThe Lament Configuration from Hellraiser
Lost in Random - Odd
UR-83D Robot
Lost in Random - Characters
CCA Flanker from Battlezone
US Grizzly from Battlezone
Lost in Random - Even & Dicey
UR-82K Robot
Geo Slime from Genshin Impact
Venti from Genshin Impact
electronicsIsoAcoustics L8R130 Speaker Stands
Yamaha MSP3 speakers
Aston Microphone's "Sprit"
Neat Microphone's "King Bee"
bzplargeCCA Flanker from Battlezone
US Razor from Battlezone
Who I am
I'm Blake and I like to tinker with things and make stuff. When I'm not programming or developing random systems, I'm playing with electronics, doodling bits of art, 3D modelling or sculpting and painting things or nerding out watching sci-fi or horror TV.
From 2001 I worked in the games industry, eventually specialising in tools to aid in the development of video games and their engines. In 2011 I left the industry and teamed up with a few other talented composers to utilise my knowledge to help build the company 'Spitfire Audio'.
I also periodically compose soundtracks for video-games and have worked on titles such as The Stanley Parable, Portal Knights, Lost in Random as well as a few random projects such as trailer for Terraria and Minecraft and the like. You've probably also heard my music in random TV commercials at some point.
What I'm using to create
I use various bits and bobs to craft my shiz.
- Elegoo Saturn 4 Ultra, Mars 5 Ultra, Mars 4 Ultra,
- 3x Mars 3 Pro backup printers for speed,
- Elegoo ABS-like Resin 3.0,
- Sunla Water-washable grey,
- Elegoo Resin Space Grey 8k,
- Phrozen Luna curing station,
- Vallejo Model Color, Game Air, various sets,
- Iwata Eclipse HP-CS & Studio Smart Jet Pro Compressor,
- Random cheapo airbrushes for base coats,
- 3D Studio Max, ZBrush and Chitubox Pro.


